Learning how to solder with the Discipad
A couple months ago, I got really into fishing in FFXIV. My hotbars are set up in game to match the 12 buttons on my mouse, but I am only able to reach 9 buttons comfortably. Fishing has a ton of skills and even if I wasn't pressing them often, my right thumb was getting fatigued!
Clearly the solution was to get a numpad to use with my left hand. But I didn't want just any numpad! I wanted the Discipad, the counterpart to my current keyboard, the Discipline V2, which I purchased prebuilt off r/mechmarket years ago.

Now if I was going to get the Discipad, I was going to have to build it myself. The problem was that I had never soldered anything in my life! Luckily some research told me that through-hole kits are great for beginners, so off I went, grabbing everything I needed to learn. Unfortunately my brain is built in a way that if I am getting into a hobby I have to go ALL OUT, so I splurged quite a bit on all the necessities...
Tools:
- Hakko FX888DX-010YW soldering iron
- KOTTO fume extractor fan
- Kester 44 solder wire, 63/37
- Hakko CHP-170 wire cutter
- Hakko SPPON solder suction tool
- Silicone soldering mat
I watched this youtube video and then got started on a beginner kit: the Jitterbug. The instructions were nice and easy to follow! I liked the part where solder the legs and the instructions tell you not to body shame any jitterbugs.
I gave the completed Jitterbug to my husband, who is an entomologist!

Definitely glad I got the practice under my belt before I moved on to the real thing. The main thing I learned was how much pressure I needed to apply when touching the solder to the iron.
Moving on to the real thing... I was still extremely nervous starting out, and you can tell. The first few diode joints look really messy because I accidentally soldered them on the front of the circuit board instead of the back... whoops.
My first real roadblock: figuring out which resistors were which. My kit didn't come with them labeled, so I had to google the 5 band color codes. I double-checked with a multimeter as well!
The USB-C connector was the most stressful part. Had some bridging issues, but the solder suction thingy had my back when I needed to fix anything!
Second roadblock: I realized my kit was missing the bottom plate for the entire thing. I emailed the store about it, but as of writing this I am still waiting for them to ship it. I wanted to continue on with the rest of the build, so I screwed in my stabilizers, soldered my NK Silk Milkshake switches, and plugged it in to my computer.
Third roadblock: the link to the flashing guide was broken. I went to the Wayback Machine to see if anyone had archived it, and sure enough there was a version I could look at! Downloaded QMK Toolbox then followed the instructions to put the Discipad into bootloader mode and... it wouldn't connect.
My heart sank! I totally thought it was because I had messed up the USB-C connector. But I tried switching cables and that did the trick. PHEW! I flashed my Discipad and then opened up VIA to test the keys.
EVERYTHING WORKED!! My first soldering project! Hopefully the back plate comes soon so I can really say it is done.
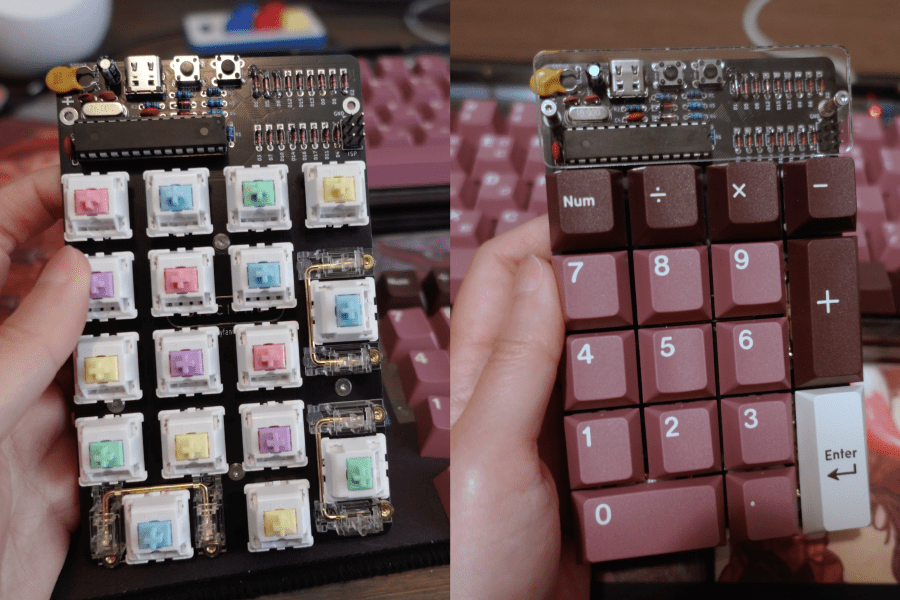
I know it's not perfect, but it doesn't need to be! I'm quite content to just have it working. Maybe some day I will revisit it and desolder some of the bits to make it nicer-looking, but for now I am already looking for new soldering projects.